Friday, December 18, 2009

Dinosaur Barbecue's Corn and Potato Chowder


Back in July I travelled with my husband to Syracuse, New York for
a few days. We went last July for the first time, and discovered this
incredible place through those booklets they place in hotel rooms so you
can scope the local restaurants. We were intrigued and when the desk staff gave
it two thumbs up, we decided to try it.

I know, I know, I hadn't learned how to take outdoor night pictures yet.
It appealed to my love of neon signs at night.

We loved Dinosaur BBQ. It's a very--um--unadorned interior, similar
to the best rock or sports bars, loud and raucous and fun. No frills here, just
great food and beer at very reasonable prices.
They feature a variety of down-home dishes, the best of which is the
barbecued pork. The recipe I'm posting today is something neither
of us tried at the restaurant, but after returning home, I found their
cookbook on the interwebs and ordered it toot sweet.

This is the first recipe I tried from the book so far, and I'm looking forward
to trying them all in time.

In the meantime I am waging a one-woman campaign to persuade
the owners to open a Dinosaur Barbecue here in Michigan.
Stay posted.


Corn and Potato Chowder
(adapted from Dinosaur Bar B Que: An American Roadhouse)


Ingredients:


1 tablespoon butter
1/4 pound bacon, diced
1 cup chopped onion
3/4 cup chopped green pepper
Kosher salt and black pepper
1 tablespoon minced garlic

2 tablespoons flour
4 cups chicken broth or stock

4 cups peeled, finely diced all-purpose potato
1 1/2 cups shredded carrot
2 cups fresh or frozen corn kernels
1 cup half-and-half
1/2 teaspoon dried thyme
pinch of cayenne pepper*
2 tablespoons chopped fresh Italian parsley


Method:


Place the butter in a soup kettle and melt over medium-high heat. Add the bacon and cook until crisp. Take bacon out and drain on paper towels.

Pour off all but 1/4 cup of fat from the pot. Toss in the onions and peppers, seasoning them with a pinch of salt and pepper. Cook until so
ft and then add garlic, cooking it all for 1 more minute.

Sprinkle on the flour and mix into the veggies. Pour in the broth and potatoes. Cover the pot and bring to a boil; lower the heat and simmer for 10-12 minutes, or until the potatoes are tender. Add the shredded carrots and corn. Cover adn simmer everything 5-6 minutes longer to blend the flavors.

Stir in the half-and-half. Season with the thyme and cayenne, if you choose to add cayenne. Add the bacon bits you saved.


Feeds 6-8.

*I was out of cayenne pepper so used a few drops of some habanero-flavored Tabasco that was perched on the stove top.


This recipe is so perfect that I didn't change much at all. I was all out of fresh thyme so I omitted it at no sacrifice to the overall taste of the sou
p. It goes together quickly and easily. I doubled it and still didn't have as much left over as I wished. What did remain for my lunch the next day was even better, after the flavors had had time to blend further.

I know, I know, this one is terribly out of focus but I had to include it
because their outdoor art is so unique. There is an outdoor bar and numerous
picnic tables, some under a canopy. The horse stands atop a small shed or
something (I didn't particularly notice-did I mention the outdoor bar?).
It's a great place to quaff a cold one and wait for your table.
And wait you will, because this place is that good and that crowded.


And here's one more shot demonstrating my photographic inadequacies.
But I like it. Neon.


Thursday, December 10, 2009

The First Snow of '09

Let It Snow?
Let It Snow?
Let It Snow?


Just a quick post to share with you what I saw from my front door last
week when I was leaving for work.
(Please pardon the mini garbage dumpster in our driveway)

This is, of course, no novel sight to those of us living in the snow belt, but I
thought you of warmer climes might enjoy the sight of our first snow in
mid-Michigan.


Tuesday, December 8, 2009

Candy Cane Cookies


The Long and Winding Ropes
(with apologies to McCartney and Lennon)


This cookie recipe is one I have been making for donkeys' years.
(See the footnote if you really must know)

I first discovered it back when I had very few (three) cookbooks. One was
cooking for two, which we still numbered in those halcyon days; along with that I had the venerable red ring-bound Betty Crocker Cookbook; and then there was the
gold-covered but long-forgotten castoff of my mother's.

So you can see that my options were few. My childhood Christmas
memories are riddled with an apron-clad mother bustling around the kitchen,
turning out pan after pan of perfectly baked cookies for the holidays.
So what was more natural than when I started a family, that I should want to
carry on that all-American tradition with my kids?

Since my daughter was old enough to sit in her high chair and fiddle with a piece
of cookie dough without immediately scarfing it, she has assisted me in these bake-fests.
And when she was joined by three brothers in somewhat rapid succession,
they too joined us in our Christmas tradition.
In one afternoon, we'd decorate a double batch of cut-out sugar cookies, some almost
artfully done (those were mine), but most heaped high with colored frosting in the
dead center of the cookie, festooned with a variety of sprinkles, jimmies, and sugar sequins.
Never was a professional baker as proud of his most delicate and elaborate work
as they were of their very own creations.

I kick myself every time I look back on those days that I didn't take more
pictures. We have a precious few, mostly of my daughter the year she was
about six years old, and almost none of the boys while they worked.

And so it goes.


Every Christmas season I ask my kids which cookies I absolutely
have to make, and my youngest son always names these.

I usually try to make at least four or five new kinds each year, along with the
old favorites. Like this one.
And I always make the ropes too fat, so that they end up looking more like bent
cigars than candy canes. Rolled too thin, they're too hard to twist.
Colorful and a bit showy, they have a texture that's a cross between a standard sugar cookie
and a sable', toothsome and not too sweet.

This year I didn't even bother bending the crook into the top of the bloody--er, blessed
things; they are what they are.

And they taste just as good as every other year.

In the bottom picture you can see part of the recipe card that brought
me this dependable and delicious recipe.


Candy Cane Cookies
(adapted from an ancient* General Mills'
Betty Crocker Recipe Card Library)

Ingredients:

1/2 cup butter, softened
1/2 cup shortening
1 cup powdered sugar
1 egg
1 teaspoon peppermint extract
1 teaspoon vanilla
2 1/2 cups flour
1 teaspoon salt
red and green food coloring

Method:

Preheat oven to 375 degrees F. Mix thoroughly the butter, shortening, powdered sugar, egg, and flavorings. Blend in flour and salt. Divide dough in half; blend food colors (green and red for Christmas) into each half.

Shape 1 teaspoon dough from each half into a 4 inch rope. For smooth, even ropes, roll them back and forth on lightly floured board (remember making snakes out of PlayDoh?). Place ropes side by side and twist them together, then roll to smooth out twisted colored ropes. Complete cookies one at a time and place on parchment-lined cookie sheets, curving one end of cookie rope to form a candy cane.

Bake about 8-9 minutes or until set and very, very light brown. If desired, crush peppermint candy canes and 1/2 cup white sugar and immediately sprinkle cookies with candy mixture; remove from baking sheet and transfer to wire cooling rack.

Makes about 4 dozen cookies.


*If you absolutely MUST know, it's from an old collection dated 1971. I received the collection in 1981 as a wedding gift.

Thursday, December 3, 2009

The Scourge Called Cafe World and Nutella Shortbreads


I promised myself that I would never grovel to my reader(s) if I
was a little less-than-frequent in my posts, but here I am, hat in hand and
head down, mumbling my apology.

I blame a certain woman in Ypsilanti who introduced me to CafeWorld.

This insidious time-gobbler is from the same lovable people
who bring you Facebook.

It's a game which allows you to set up your own cafe, complete with a basic
set of equipment and furniture and funds to cook a few dishes and then you
start and at first it seems harmless enough but soon you're plotting how to get
those long-cooking dishes finished and served so you can serve more customers
and get far enough ahead of the cooking so you can take a minute to breathe and then it's
back at it again, cooking more and more bacon cheeseburgers and fruit salads
so you can afford to expand and draw more business and then you expand again and
pretty soon you're planning your entire life around this dumb game, timing
your leisure hours around when your food is finished and can be served.

Friends who introduce you to this terrible time-waster are not
your friends at all.

I mean you, Carmen!!


And now, back to your regularly-scheduled program.

Nutella.

I thought I was raised in a cultured, well-rounded atmosphere,
traveling now and then, exposed to much of what life has to offer.

But never, never, did anyone tell me about this stuff.
This wondrous stuff.
Nutella.

It's quite a mystery to me because, as you know, I hate and loathe
nuts in any form or shape.
This marvelous goop is hazelnut-flavored.
Hazelnut.
So why do I like it?
Because it looks so much like chocolate?
Probably.

I researched this product thoroughly (thank you, google) and
found surprisingly little information about it, other than the fact
that Nutella was developed during World War II to compensate for
the scarcity of chocolate in those lean years. Can it be that something
so good came out of something so bad?
Life is strange.

There are many recipes out there that include Nutella, so many that I had to
find out what the fuss was all about.

Now I know, and here's a delicious recipe for you, too. It's a softly crisp
shortbread that goes together so easily, you'll wonder why people would
ever buy shortbread cookies.
These are far superior.

Try them and see!


Nutella Shortbread Cookies
(adapted from a recipe from Besotted Gourmet)


Ingredients:

3 sticks (or 3/4 of a pound) of butter, softened
1 cup sugar, white
1 teaspoon vanilla

3 1/2 cups AP flour
1/4 teaspoon salt
1 tablespoon turbinado sugar
1 cup Nutella

Method:

Preheat oven to 350 degrees F. In electric mixer, cream the but
ter, sugar, and vanilla. Mix flour, salt, and mix well. Add dry ingredients to creamed mixture, mixing well until blended.

Place dough on large piece of waxed paper. Cover with another sheet and roll out dough to 1/2 inch thickness and using round biscuit cutter, cut out cookies and place on cookie sheets lined with silpat or parchment paper.

Sprinkle cookies with turbinado sugar and bake for 10-12 minutes*
Let them cool for 5 minutes before removing to cooling rack.

To make sandwich-type cookies**, frost one cookie with Nutella and cover with another cookie. Rinse, lather, repeat.


*When I tried this recipe, I found to my dismay that the baking time was woefully inaccurate--or I should say, probably, that for the thickness I rolled my cookies, baking time was way off (22-25 minutes!) My first tray was too dark, although still tasty.
I would suggest that you watch them closely while baking and dete
rmine length of bake time for yourself.

**These would also be pretty much delicious if you left them as singles frosted with Nutella, too.


Friday, November 20, 2009

Bruschetta with Peppers and Blue Cheese


Bruschetta with Peppers and Blue Cheese


I love blue cheese so much it's almost unnatural.
My passion knows no bounds
and brooks no interference in its efforts to satisfy its cravings.

I have dallied with gorgonzola but find it weak and a little wishy-washy.
To tempt me, it has to be Danish blue, he of the pungent aroma and sharp bite.
I like a lot of sass in my food and my men.

If it had been up to me, this pan would have been rife with blue cheese,
and, oh, yeah, better put some peppers on there, too.

It's a little hard to distinguish, but I placed all the bread slices on the pan
and then sprinkled them with all the toppings.
Much, much easier than making each one individually.

I've even included before and after pics so you can see what it looks like before
going into the oven, and then all the creamy goodness when the cheese melts
in the third picture.


Bruschetta with Peppers and Blue Cheese
(adapted from The Barefoot Contessa Back to Basics
by Ina Garten)

Ingredients:

1/4 cup olive oil, plus extra for brushing bread
1 red bell pepper, seeded and cut into short, thin strips
1 orange bell pepper, seeded and cut into short, thin strips
1 green bell pepper, seeded and cut into short, thin strips

1 teaspoon sugar
1/4 cup julienned fresh basil leaves
kosher salt and freshly ground black pepper
12-15 1 inch slices of fresh baguette
4-5 oz. Danish blue cheese at room temperature

Method:

Preheat the oven to 375 degrees F.
Heat the olive oil over medium heat in a large skillet. Add all the peppers and saute' for 12-15 minutes, stirring occasionally until tender. Sprinkle with the sugar and saute' for 2-3 more minutes. Stir in the basil and sprinkle with salt and pepper to taste; set aside.
Arrange the bread slices in rows on cookie sheets lined with parchment paper. Brush each slice lightly with olive oil and toast for 7-10 minutes
until lightly browned.*

Top each toast with a spoonful of the pepper mixture and sprinkle with blue cheese crumbles. Return to the oven for a minute or two to warm the cheese. Sprinkle with salt and serve.


I skipped a step and omitted toasting the bread first. Instead I piled on the toppings and broiled them until the cheese looked slightly melted.


Saturday, November 7, 2009

Pappa Al Pomodoro and A Childish Hatred Laid To Rest


Tomatoes.

For most of the years of my life (and that is getting to be a considerable number)
I have hated cooked tomatoes.
Pizza sauce, spaghetti sauce, ketchup--I enjoyed all of those.
But whole or cut-up and cooked tomatoes, even tomato juice I couldn't choke down.
Wouldn't even eat Campbell's tomato soup.
Particularly anathema to me were tomatoes stewed.

When I look back and analyze this hatred, I think it was the
texture of the things that grossed me out.
They remind me of great big blood clots or something equally unpleasant.
(Sorry for that vivid image).
And those seeds floating around--yuck.

As an adult, though, I have to say that even though it's not exactly
the real thing, I can enjoy a can of Campbell's for a quick lunch.
Still can't stomach the stewed kind, which for some reason, my mother
felt she had to serve about once a month during my formative years.
I swore I'd never do that to my kids.
And I haven't.

Fortunately before I became too old a dog to learn new ways,
I found this recipe of Ina Garten's.
I have to admit, at first I thought it was a pasta dish (can you tell we're
not Italian?) but as I
examined the recipe and list of ingredients, I saw it was soup.
I decided to try it anyway.
Ms. Garten has never let me down before.

And she still hasn't. This soup is so creamy, so
perfectly seasoned and balanced, that the large potful the recipe made
was polished off in one meal.
You don't readily discern the ciabatta since it disintegrates
during the whisking, but it gives the soup its perfect smoothness (again with the texture).

I was really looking forward to leftovers, to see how it tasted
the second time after being reheated. Some things are actually better the second time around. Lasagna springs to mind. Guess I'll have to make this soup again soon in order
to find that out.

This recipe is not for those in a hurry. In addition to the prep time, it simmers for
forty-five minutes and then some.
But what makes this soup so outstanding is its slow melding of carrots, onions,
garlic and basil as it cooks.
The taste is much more satisfying for its slow cooking.

Who else but The Barefoot Contessa could make a tomato
soup lover out of me?

My mother will never believe it.


Pappa Al Pomodoro
(adapted from Ina Garten's recipe in The Barefoot Contessa's Back to Basics)


Ingredients:

1/2 cup good olive oil
2 cups chopped yellow onions
1 cup medium-diced carrots, unpeeled (3 carrots)
4 teaspoons minced garlic (4 cloves)
3 cups diced ciabatta bread (1 inch cubes)
2 (28 oz. each) cans good Italian plum tomatoes (I used San Marzano)
4 cups chicken stock
1/2 cup dry red wine
1 cup chopped fresh basil leaves
Kosher salt and freshly ground black pepper
1/2 cup freshly grated Fontina cheese

For the topping:

3 cups chopped ciabatta bread (1 inch cubes)
2 oz. sliced pancetta, chopped
24-30 whole fresh basil leaves
3 tablespoons good olive oil, plus more for serving

Method:

Heat the oil in a large stockpot over medium heat. Add the onions, carrots, and garlic and cook over medium-low heat for 10 minutes, or until tender. Add the ciabatta cubes and cook for 5 more minutes. Place the tomatoes in the bowl of a food processor fitted with the steel blade and process just until coarsely chopped. Add the tomatoes to the pot along with the chicken stock, red wine, basil, 1 tablespoon salt and 1 1/2 teaspoons pepper.

Bring the soup to a boil, lower the heat and allow to simmer, partially covered, for 45 minutes.

Meanwhile, preheat the oven to 375 degrees F.

For the topping, place the ciabatta, pancetta, and basil on a sheet pan large enough to hold them in a single layer. Drizzle with olive oil, sprinkle with salt and pepper and toss well. Cook, stirring occasionally, for 20-25 minutes or until all the ingredients are crisp. Reheat the soup if necessary; beat with a wire whisk until the bread is broken up. Season further according to individual taste.

Serve hot, sprinkling grated Fontina cheese and pancetta and toasted bread crumbs on each serving.


Friday, November 6, 2009

Borgle Scones-Or The Isabel Revolt


Isabel Weighs In


In an incident my family calls The Isabel Rebellion, our dog protested because
so far, all my culinary efforts have been for the benefit of the family and not her.

In case I haven't mentioned her before, she is a Borgle: half beagle and half Border collie.
Half of her wants to run into the woods looking for rabbits and the other half scouts
around for a flock of sheep she can round up.

It can be very annoying.

The one benefit is that whenever Isabel hears us yell at the cat to get down off the
dining table, she gallops to the scene and herds said cat down and out of the room.
Then they start wrestling and mayhem ensues.

Or maybe I should say 'the fur flies'.

She also treats my teen-aged sons' friends like cattle and tries to move them out of
my kitchen (thanks, dog) into the family room where she thinks they should be. (And of course they all humor her).

That'll do, pig.


I've been scouting around the interweb and found this book which I promptly ordered.

Here is the first recipe I tried. I'd like to think Izzy has a cultured palate and
discriminating taste, but the reality is that she'd scarf pretty much whatever I make her
sit up and beg for. She considers it demeaning to beg but is willing to do it for the sake
of these scones.

Scrumptious Scottie Scones, aka Borgle Scones
adapted from Three Dog Bakery Cookbook

Ingredients:

2 cups whole wheat flour (you could use a cup of white and wheat)
2 teaspoons baking powder
1 tablespoon honey
3/4 cup vegetable oil
1 egg

1/2 cup 2% milk*
1 clove garlic, minced

Method:

Preheat oven to 350 degrees F.

Combine flour, baking powder and honey in a bowl. Add oil, egg, milk and garlic, then stir until mixed thoroughly.


Turn out dough onto a lightly floured surface and knead.
Roll out to 1/2 inch thickness and cut into 2 inch squares;** place on greased baking sheet.


Bake for 15 minutes. Cool on a wire rack. Store in an airtight container.

Makes approx. 25 little squares.


* I used 2 % milk 'cause that's what we have on hand. Any strength milk will do.

**I love the traditional scone shape so I rolled the dough into two circles and cut them into pie-shaped wedges.

These scones stay soft; they're not crisp like some treats are.


These are great, according to my canine guinea pigs Isabel and Casey, but they do not keep well. In an airtight ziploc-type bag, the scones kept for about a week before growing fur of their own.

The cookbook also notes that garlic is a natural flea repellent so this is a good treat for summer months.

Penne' and Cheese


First of all, I know these pictures stink.
My photography skills are improving (really!) but these pics
certainly don't reflect it.
Trouble is, I was shooting at night when most of the light was---gasp!---
fluorescent.

I didn't know. I can only claim ignorance. I didn't know the havoc
that fluorescent bulbs can do to your photos.
That ugly, mustard-yellow hue. Ye gods. And editing can only do so much.
One of the food blogger's biggest curses: Daylight Savings Time.

Every time you try to photograph something, you end up with absolutely
no natural light by suppertime. And my artificial light and light box attempts
have not proved exactly stellar so far.
But practice does make you, if not perfect, at least mediocre.
That's what I'm shooting for. (shooting-pun-hehe)

This dish was a crowd-pleaser and it was as easy to throw together
as the dreaded blue box that my kids were raised on.
Well, almost as easy. I exaggerate occasionally.

And the cheese. OMG, the cheese.
I can only imagine how good this would be with Red Leicester, but we don't
run to such exotic stuff around here.

Do not be dismayed by the amount of pasta and cheese in the pictures.
I had to double the recipe in order to feed my crew and have a bit
leftover for lunch the next day.


Another Recipe for Mac and Cheese
(adapted loosely from Nigella Lawson's Nigella Express)


Ingredients:

8 oz. penne'*
2 cups shredded mixture of cheeses (Nigella uses mature Cheddar or Red Leicester cheese; I used a combo of Cheddar and Monterey Jack)
1 cup evaporated milk
2 eggs
grating of fresh nutmeg (I used ground 'cause that's what I had on hand)


Method:

Preheat the oven to 425 degrees F. Cook the penne' according to package directions; drain, and then return it to the pan.

While the pasta's cooking, put the cheese, evaporated milk, eggs, and nutmeg into large bowl and mix well. If you have a very large whisk, as I do, that works wonderfully.


Pour over the penne'; stir well and season to taste.**

Pour pasta mixture into a medium-sized roaster pan or its equal; you want something wide and shallow. Bake for about 10-15 minutes, until surface is bubbly. Serves 4, or maybe 2 very needy people as this is great comfort food.


*Technically speaking, this would make it Penne' and Cheese, I suppose.

**I am a little shy about seasoning a dish before serving. I figure everyone can salt and pepper to their individual taste preference. That being said, this needs a LOT of salt, unless you're using mature Cheddar, in which case it might be just right.


Tuesday, November 3, 2009

Every Day with Janey Ray?


Yes, I am posting a Rachel Ray. It's one that I tried for the first time
this week, and it was easy, fast, and filling.
I usually try to avoid bacon, being the little strips of death that they are
(cardio-wise), but I figured in this case, it was permissible, and my
bacon fans agreed. Of course, they're the same people who think bacon is
a food group. I include dark chocolate in my nutritional pyramid, so I guess
I'm no better.

Anyway, for a fast and easy entree' on one of those hectic nights ahead,
I give you.....


Rigatoni with Bacon and Parmesan
(adapted from Every Day with Rachel Ray)


Ingredients:

1 1/3 pound rigatoni pasta
1/4 cup EVOO
1 1/2 cup chicken broth
1/2 cup finely grated Parmesan cheese, plus more for topping
3/4 pound bacon, fried crisp and broken into bits*
salt and pepper


Method:

In a pot of boiling, salted water, cook the pasta until al dente. Drain.
At the same time, heat chicken broth in large frying pan with high (not sloping) sides. Bring to a boil, then lower the heat and add the pasta and toss.
Remove the skillet from the heat and stir in 1 cup of Parmesan and the bacon.
Season with salt and pepper; toss again. Place remaining Parmesan in a bowl to
serve on the side.


*I'm not sure where I picked up this idea, but I've been using this method for months now and would never go back to the old way of frying bacon.
I used to avoid recipes that used bacon or omitted it because of all the mess of frying it. It always left the stovetop an immense mess.
Now I spray an old cookie sheet (the ones I no longer use for cookies but let the kids use it for baking oven french fries or pizza rolls-don't worry, I don't eat the horrendous things) with Pam and place the bacon strips on the pan and cook it in the oven until it looks crispy.

One caveat: do not forget to spray the cookie sheet with Pam or a reasonable
facsimile thereof. Once I fused the bacon to the pan and had a devil of a time getting it off.


I'll be damned, but I forgot to take a picture of this one, too. In all fairness to me, though, the Mongol hordes were so hungry that they swarmed the kitchen and there really wasn't time for me to grab my camera, let alone focus and snap a pic.


Thursday, October 22, 2009

Butterscotch Or Scutterbotch?


I grew up with a mom that wasn't exactly a laugh a minute.

Don't get me wrong--I love my mom bunches, but her sense of humor
was what I might describe as quiet.

She did, however, love playing with words.
Like saying 'absotively' and 'posilutely' (I won't insult you by translating).

So the day I heard her call those light brown chips 'scutterbotch', I
adopted it as my own. And to this day, my fascination with words grows.

So for my mom, who at 82 years old and still the best cook I know,
I give you...


...Scrumptious Oatmeal Scutterbotch Cookies
(adapted from a recipe from Vintage Victuals)


Ingredients:

3/4 cup unsalted butter (I used regular), softened
3/4 cup sugar
3/4 cup light brown sugar, packed

2 eggs, large is best
1 1/2 teaspoons best vanilla
1 1/4 cups AP flour
1 teaspoon baking soda
1/2 teaspoon salt
3 cups regular oatmeal (not quick-cooking)
1 12-oz package of butterscotch chips

Method:


Preheat oven to 375 degrees F. Cream butter and sugars until light and fluffy.
Add the eggs, one at a time, incorporating well. Beat in vanilla.

In another bowl, combine flour, baking soda, salt and oatmeal. Gradually add the dry ingredient mixture into the creamed mixture. Stir in butterscotch chips.

Use a large ice cream scoop (or heaping tablespoonsful) leveled off to drop the
cookie dough onto the cookie sheets. These will spread while baking.

Bake for about 8 minutes or until edges are lightly browned. C
ool for 5 minutes before removing to a cooling rack.


Like It Or Leave It...For Me


I don't know about you, but I have two people in my immediate vicinity
that dislike coconut.

Yeah, I agree with you--they're crazy that way.

If you have someone like that that you're baking for, this cookie is
not for them.

I mean to say, you could put aside some of this cookie dough before you add
the coconut, baking both kinds but thereby shamelessly spoiling and enabling them in this
arbitrary aversion.

Not me, boy.

I don't coddle 'em. If my husband and son don't like coconut,
that's all the more for me.


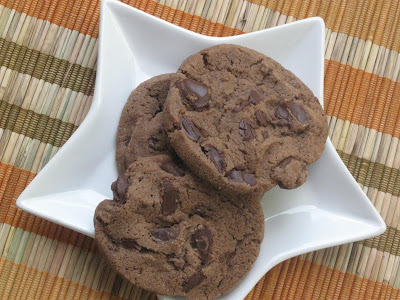
Double-Chocolate Coconut Cookies
(
adapted from Jess Thomson)


Ingredients:

2 cups AP flour
1 teaspoon baking soda
1 teaspoon salt
2/3 cup regular cocoa powder
1 cup regular butter, softened*
2/3 cup packed brown sugar
2/3 cup sugar
2 eggs, large is best
1 teaspoon best vanilla
1 1/2 cups sweetened flaked coconut

1 1/2 cups dark chocolate chunks

Method:

Preheat oven to 350 degrees F. Cover two baking sheets with silpat or parchment paper.
Sift first four ingredients into a medium bowl and set aside.**
In an electric mixer with paddle attachment ***, cream the butter and both sugars on medium speed until light and fluffy, scraping bowl frequentl
y. Add the eggs, one a time, mixing well. Add vanilla and mix well. On low speed, add the dry ingredients that were set aside and blend just until incorporated. Stir in coconut and chocolate chunks.

Drop batter in heaping tablespoonsful (I used a medium-sized ice cream scoop)
onto cookie sheets. Bake for 12-14 minutes. The cookies are done when the edges are firm. Cool for 5 minutes before placing on cooling racks.


*The original recipe called for unsalted butter, but I thought the salt in regular butter would enhance the sweetness of the dark chocolate, and
I was right!

**I rarely sift dry ingredients in recipes; I simply place them all in the bowl and whisk them a bit--it works fine for most things.

***I'm not sure why recipes always specify 'paddle attachmen
t'--seems a bit of snobbery to me, since not everyone has a KitchenAid. Until last Christmas, I used a Sunbeam with traditional beaters and it worked well for an amazing number of years.


These dark brown beauties looked so dark in some of my pictures
they looked black!

Monday, October 12, 2009

Hold on, I'm comin' -----back, that is.
One of these days.

The truth is, and I may have mentioned this before,
I have a chronic pain condition, which hits when and where it pleases.
This fall has been particularly bad for me, and according to my
rheumatologist, bad for everyone with this condition.
So, no, I'm not giving up on this blog, nor am I ignoring it.
Just waiting until I feel well enough to get back at it.
I've even got five or six posts' worth of pictures edited and ready to go.
It's a matter of getting the stupid pain quieted down enough to be able to sit in my
desk chair long enough to write them.
And the energy to have something to say other than 'give me DRUGS!"

But I will be back soon. I have high hopes for the new set of drugs
they're trying me on.
Until then, when I can, I'm still cooking and baking when I feel up to it.

See you soon.

Wednesday, September 16, 2009


Open-Faced Crab Melts
(from one of the Reiman Publications)


Here's a quick and easy one for those days when you just can't face one more task.
When you really need someone else to be cooking for you and not the other way around.
And you know that's not going to be happening any time soon.

So you pull out this recipe-
quick, hot, nutritious, and with all that cheese, fairly indulgent.

Enjoy!


Open-faced Crab Melts


Ingredients:

4 English muffins, split
1 pkg. crabmeat
1/3 cup mayonnaise

1 tablespoon lemon juice
1/2 teaspoon pepper
1/4 teaspoon dried tarragon
1 cup shredded cheddar cheese


Method: Broil English muffins 4-6 inches from the heat for 2-3 minutes or until golden brown. In a bowl, combine the crab, mayo, lemon juice, pe
pper and tarragon. Spread over each muffin half; sprinkle with cheddar cheese. Broil for 2-3 minutes or until cheese is melted. Yield: 4 servings.


Blue Cheese Cookies?!


I know, I know---I sort of cringed when I saw the name of this recipe.
'Blue cheese' and 'cookie' have never been used in the same sentence before,
at least not in JaneWorld. And they should not.

Except for these flavorful morsels.
These little rounds would make a great cocktail...um, cookie?
They are savory, I promise, and would complement the taste of
just about any mixed drink or beer very well.

But no matter what else you choose to serve with these cookies,
they are a great appetizer and are very easy and quick to throw together.

How can they be quick, you ask, when they need to be rolled and cut out?

I'm so happy that you asked. These can be rapidly rolling-pinned (I think I just
coined another JaneWorld vocabulary word here) and cut out with a biscuit cutter or drinking glass, if need be; the beautiful thing is that they don't need to be perfect because
they rely on a great blue-cheese taste. And everyone knows that at parties,
people are not as picky, perhaps because of the alcohol, but at any rate, if
they're not precisely even or not exactly round, who cares?
Not all those half-soused guests of yours. They're just thrilled to get something
to gobble up so the booze doesn't go to their head too fast.

I threw about half the batch into a ziploc bag and bunged it into the
freezer so that at those holiday gatherings I'll have something to grab and share
when I've forgotten to prepare something, as I often do.


Blue Cheese Cookies
(adapted from pastry studio)


Ingredients:

6 oz blue cheese, softened
4 oz butter, softened
1/4 cup plus 2 tablespoons granulated sugar
1/4 teaspoon salt
1 1/2 cup flour

Method:


Blend blue cheese, butter, sugar and salt in a food processor until creamy. Add flour and pulse until mixture just starts to come together and forms a clump. Gather dough and place on a piece of waxed paper. Flatten into a disk and place another piece of waxed paper over the top. Roll out the dough between the two sheets of waxed paper to about 1/4 inch thickness. Slide the dough, still between the paper, onto a baking sheet and refrigerate until thoroughly chilled, preferably overnight.

Preheat oven to 325 degrees F. Line 2 baking sheets with parchment paper. Remove the cookie dough from the refrigerator and gently lift off the top sheet of waxed paper. Use a 2 inch cookie cutter or a sharp knife to cut out cookies. Transfer to the baking sheets. You want the dough to remain cold, so work quickly.

Bake for about 15-18 minutes* or until the edges just start to turn golden, rotating baking pans halfway through.** Cool on a wire rack. Cookies can be stored in an airtight container at room temperature for several days.


I came up 2 oz. short on the blue cheese (forgot the golden rule of double-checking the recipe and noting the amounts needed before going to the grocery store) so made up the difference with already shredded Colby-Jack cheese. This gave the cookies miniscule orange flecks that were quite attractive but didn't really show up after baking.


* Mine were done just before 15 minutes had elapsed so watch them carefully.

**I did not bother with rotating pans, etc. I just baked them one sheet at a time and they came out fine.


Thursday, September 10, 2009

Canine Cookies

BoneHenge
(sorry; couldn't resist.)


Peanut Butter Dog Treats
(this recipe is all over the interwebs, but I got it from
dogcookiecutters.com/dogtreat)


Ingredients:

2 cups whole wheat flour
1 tablespoon baking powder
1 cup peanut butter
1 cup whole milk.


Method:

Preheat oven to 375 degrees F.

In a bowl, combine flour and baking powder and set aside.
In a separate bowl, mix peanut butter and milk; I suggest using a whisk to get smoother results than just using a spoon. Add this to dry ingredients and mix well. Place dough on a lightly floured surface and knead u
ntil dough is smooth. Roll dough to 1/4 inch thickness, then cut out dough using dog bone cookie cutter and place on parchment-lined cookie sheets.

Bake for approx. 20 minutes until lightly brown.* Cool on wire rack and store in airtight container.


*This is kind of silly because the dough is already darker than 'lightly brown' before baking!


I really like this recipe because it comes together so quickly and with a minimum of fuss.
I actually threw it together while talking to my best friend on the phone.
And then, too, it makes the whole house smell like peanut butter, which is a win-win situation.


This recipe got two paws up from my dog, Isabel and I'm betting
your pampered pooch will like them, too.

Wednesday, September 9, 2009

Jane:1, Red Velvet::1


Jane: 1; Red Velvet:1


Dear Red Velvet: Don't think this is over. Not by a long shot.
The Food Network Throwdown recipe may have won the battle,
but it didn't win the war. Not yet.

Not while I still have...wait for it...


Red Velvet Cupcakes from Better Homes and Gardens!!!

Yes, this one was good. And not just good. Excellent, in fact.
I still had just the lame-o super red coloring gel to use so my
cupcakes were more of a dark coral color than truly tomato red.

Nevertheless--Jane triumphed.
Never let it be said that a flavor got the best of Me.

So here it is, from Better Homes and Gardens, a name you've
trusted for donkeys' years...


Red Velvet Cupcakes


Ingredients:

3 cups all-purpose flour
2 teaspoons unsweetened cocoa powder
3/4 teaspoon salt
3 large eggs at room temperature
3/4 cup butter at room temperature
2 1/4 cups granulated sugar
1 1/2 teaspoon vanilla extract
1 oz. bottle of red food coloring (2 tablespoons)
1 1/2 cups buttermilk
1 1/2 teaspoon baking soda
1 1/2 teaspoon vinegar


Method:

Preheat oven to 350 degrees F. Line cupcake pans with paper liners.
In a medium bowl, whisk together flour, cocoa powder and salt. Set aside.
In a large mixing bowl, beat butter on medium speed for 30 seconds. Add sugar and vanilla; beat until combined. One at a time, add eggs and beat on medium speed after each. Beat in food coloring ON LOW.*

Alternately add flour mixture and buttermilk to egg mixture; beat on low-medium speed after each only until combined.

**Stir together baking soda and vinegar.** Add to batter and beat just until combined.

Fill cupcake liners 2/3 full. Bake 15-17 minutes or until toothpick inserted comes out clean. Cool pans on wire racks for 10 minutes, then gently remove cupcakes from pans to cool completely.

Frost or dust with powdered sugar.


*Don't ask.

**Just a friendly head's up on this--this is not included in most other cupcake recipes. I don't ever remember coming across this technique of combining vinegar and baking soda before. Have you?


Peanut Butter Chocolate Chunk Brownies with Ganache Topping


Oops. Too late.


I suppose if one were burning w
ith curiosity as to who had attacked this
brownie prior to the photo, one could always access dental
records, (bite marks are pretty damning evidence, don't you think?) but is it really that important? You can still see the big chunks of
chocolate, the denseness of the peanut butter brownie, and the thick layer of
semisweet topping; everything you need to see, in fact, to convince you to try this recipe. Except for the faint traces of chocolat
e on someone's
front choppers. Naming no names.


Peanut Butter Chocolate Chunk Brownies with Chocolate Ganache
(adapted from Cookie Madness)

Ingredients:

8 oz. (two sticks) unsalted butter, cut into slivers
1 3/4 cup granulated sugar
1/2 teaspoon salt
2 teaspoons vanilla extract
1 cup peanut butter
2 large eggs plus 1 egg yolk
2 cups all-purpose flour
1 1/2 cups semisweet chocolate chunks (or more; you know me--or actually, you don't-I almost always add extra chocolate chunks, chips, etc.)

Ganache:

1 1/2 cups semisweet chocolate chips (only because they melt faster than chunks)
1/2 cup heavy cream
1 tablespoon unsalted butter, softened


Method:

Preheat oven to 350 degrees F. Line a 13 x 9 inch metal pan* and spray with
non-stick cooking spray or rub with butter.

Cream the butter and sugar with electric or stand mixer. When light and fluffy,
add peanut butter and beat until incorporated. Beat in eggs, the egg yolk and vanilla. By hand, stir in the flour and chocolate chunks. Spread batter in pan, patting it down flat**, and bake on center rack for 35-40 minutes or until puffed
and golden. Cool completely.

Make the ganache: place chocolate chips in heat-proof bowl. In a saucepan, heat the cream until it starts to boil. Pour the cream over the chips and let stand for a minute. Stir well to melt chips; stir in the butter. Spread on cooled brownies and let set.

Makes 36 bars. Don't scoff at this; they are very, very rich.


* I usually use a Corning 13 x 9 glass pan, adjusting my oven temp. to compensate. (You know about lowering recipe temps. about 25 degrees F. when using glass dishes, right?)

** I usually spray a Rubbermaid spatula with non-stick spray to pat the batter down with and smooth the surface a bit.

Tuesday, September 1, 2009

Pick Yourself Up, Dust Yourself Off, etc etc.


Yesterday's Fail has been preying on my mind.
It really pisses me off to waste expensive ingredients on something
that turns out to be inedible (almost typed indelible--here's a trick--stare at both words
long enough and your eyes will spaz out completely) and
still not even know the whys and wherefores of the problem.

So I did what I always do when faced with culinary roadblocks:

I called my mom.

I know how blessed I am to have reached this age and still have my mom
standing in, if not the wings, then at least within cell-phone range.
She has had over 62 years of cooking and baking for a family of five and
lived to tell the tales. Mom is the only one to still go through the time-honored
process of making kolache every Christmas--and she's not even Czech.
It's a family recipe from my father's side, and she learned at my
grandma's elbow how to make them.
Side note: none of my aunts ever did the kolache thing, but they loved my mom's!

I know that nearly everyone thinks that their mom is the best cook/baker
in the world--and poor, deluded souls they are, too--only I know that through
some accident of birth, some cosmic shake-and-shimmy, I am descended
from She Who Rules The Kitchen. If Mary Lou has had any Epic Fails in the
kitchen, I've never heard about it (but that would make a good post, wouldn't it?)

So I regaled her with my latest Red Velvet exploits. And, oddly enough, she had
absolutely no idea, no inkling (as she puts it) of why it happened.
We concluded that it probably wasn't my subbing in canola oil for the
vegetable oil written in the recipe, or the non-stick spray I used, since
both of us have used those things before with normal results.
As we talked it over, a vague olfactory deja vu hit me--

Yes, cats and kittens, I'd passed this way before (Note: see Seals and Crofts).
That--that--smell had assaulted my schnozz about a year ago. The memory is still
fuzzy as I write this, but then I've always been big on blotting out unpleasant
not to say traumatic experiences.

And the culprit?

Those bloody mini-Bundt pans!

Mom suggested that maybe some weirdo chemical reaction happened to
the non-stick coating of the pans when sprayed with the non-stick spray.
Sounds reasonable.
Of course, to be sure, I'd have to redo the entire thing exactly as before, including
forgetting to add the vanilla until after I added the eggs like I did the first time--
a non-crucial step, I'm pretty sure.

But a closer look at the recipe also revealed something Fourth-of-July gasp-worthy:

this recipe included a nutritional run-down--

In each normal-sized cupcake?

59.7 grams of fat!!!!!

I would be shrieking but this is not an auditory medium.

I will be plunging into the depths of my recipe files to locate a Red Velvet
three-layer cake recipe shared by a neighbor eons ago which I have
successfully made (in cake form, mind you) and try to modify it for cupcakes.

Stay tuned!

Monday, August 31, 2009


Dear Reader,
(which, judging by the number of comments received,
is the right tense)

I have decided to make this blog a little more personal.
For years I have kept a journal, sometimes writing every day,
sometimes skipping entire years. Writing that flowed prettily
along the pages and writing that tore at the paper in angry black strokes.
I started writing as a sort of safety valve for the years of built-up steam and frustration.
Then I decided that after I'm gone, in the dead sense, I want any of
my kids who are interested and have the time between therapy sessions, to
read my journals and just maybe understand their mom a little better.

(there should be a transitioning sentence or two here but I couldn't
come up with one. Bite me.)

All the best books on writing say that to be a good writer, you must
find your voice.
After lurking in the food blogosphere for months and reading post after
post of food bloggers that I enjoyed, I've noticed a few things, one of which
I now share regarding this blog:

I am not Steamy Kitchen.
I am not Thursday Night Smackdown.
I am not Technicolor Kitchen.

I'm not any of those bloggers whose work I admire and enjoy every week.
I wish I could write like them. They each have such individual and entertaining
voices. I find myself LOLing whenever I'm in GoogleReader.

It's tough to find your own voice.
Your own point of view.
Your uniqueness. (is that a word? Really?)

Your own style, if you will.

And the only conclusion I can come to is that when I write in my journal,
I sound like Me.
I write as if I'm talking to - well, myself, I guess. Or e-mailing a friend that
knows me well enough to understand my jokes and foibles.

I don't know if you'll notice any difference in the sound of this blog or not.
I will no longer be trying to sound like a food blogger, though.

I'm just gonna be me.
(cue Frank Sinatra recording...)

So here we go.
I hope you enjoy reading over my shoulder.


The Red Velvet Debacle

Dear Me,

Well, that didn't go very well, did it?
Dammit, I thought a Food Network recipe would be foolproof.
And I'm sure it's not the fault of the recipe.
After all, it was from a Bobby Flay Throwdown. Although technically
the recipe was from his competitor, a woman who sells cupcakes for a
living in NYC. I would have thought that it would be good in spite of myself.

But no.

It should've been a tip off when I couldn't even get the batter to turn red.
I was out of liquid food coloring, had to use paste instead, which up 'til now has always
served me well. Bright vivid colors staining the frosting as well as my fingers.

But no.

This time so-called Super Red gave me a big raspberry, literally and
figuratively. Mighty Mac's bowl was filled with dark pink batter.
I even flew it past my son who peered into the bowl, swished the spatula
around and said laconically, "Raspberry."

FAIL.

I watched the blobs of batter dripping from the spatula. Shit.

But okay, this can still be delicious, right?
Wrong color, so I can't exactly claim these as Red Velvet, but as long
as they taste good, that's all I care about.

But no.

I wanted to use a couple of mini-Bundt cupcake pans that I had only used once,
so that meant I had to skip the paper liners and just spray the hell out of
the pans. Which I did. I had just enough Crisco non-stick stuff (with flour included,
though how they manage that beats the hell out of me) to do one pan, and used
butter-flavored for the remaining one.
Used my new medium-sized ice cream scoop to fill the swirly-shaped cups.
Wouldn't it be adorable to have cupcakes with little swirly bottoms?

I'll save myself some time, since this is clearly not a memory I wish to
chronicle and cherish, to say that the cupcakes smelled putrid in the oven.
I kept hoping it was just my hyper-sensitive nose and that I could
still pull off deliciously cream cheese frosting'd cupcakes for dinner. I
pictured the admiring oohs and ahhs as my family bit into them.
But when they cooled, the odor was no better.
My son ate one and said they were fine, but then, he's The Suck-Up
of the family. Not really, that's not fair to say that--but being the youngest,
I do think he tries to avoid saying the wrong thing (because when you're
fourth out of four, self-preservation and not pissing off a sibling is the
name of the game.)
These will be taking up precious space in the local landfill because I
cannot stand to serve them.
And tomorrow is another day.

My right arm is starting to really hurt so I have to wrap this up.
Suffice it to say I'm not sure whether it was the non-stick spray I used or
that I subbed canola oil for vegetable, but this was an Epic Fail.
Or like the Ex's high school students used to say after bombing a test:

"I failed HARD."

Friday, August 28, 2009

Korova Cookies

-from Dorie Greenspan-
(there's no point in typing the recipe because the interwebs is
littered with it.)


Okay, so I have joined the numberless throng that have baked these cookies.
And they were all right in heaping praise on this recipe.
It's everything people said it was, and more.

World Peace Cookies.

A tall order, but then we've tried everything else.


Monday, August 17, 2009


My little problem with my arm has curtailed much of my
kitchen activities-alas.
My daughter, however, concocted a brilliant
fritatta for brunch yesterday, full of sausage, peppers, and cheese,
a symphony for the tastebuds.
I only wish we had taken a picture of it so I could squeeze a post out of it!

I have to admit: it was my first taste of a fritatta.
I am of the age of omelettes which is not at all the same thing, I learned.
Potayto, potahto-half the pleasure of it was having someone else cook for a change.

I've had enough of a vacation from the kitchen, though.
I'm ready to BAKE again.

My cookie sheets--they call to me.

Saturday, August 8, 2009


So.

About my arm.

The pain disappeared eventually in spite of the physical nature of
my job but returned after a couple of days of pain-free functioning.

I actually got in a week or so at work before I started feeling that old feeling,
and I don't mean love.
(Remember that great scene in Radioland Murder where Rosemary
Clooney sings 'That Old Feeling'? If I could sing like that, you'd have
to pay me to shut up.)

I called my doctor's office on Thursday but couldn't get in to see the P.A.
until this coming Monday. It's scandalous. I've never had to wait so long
to get in. The voice on the phone explained that I could get in
sooner if I didn't have Blue Cross. Huh?

Yeah. That's not a typo.

The voice went on to say that they have a doctor in their practice that
doesn't take Blue Cross or PhP patients: "Well, what I mean is, they
won't work with her."

Excuse me? If you had a medical office with numerous doctors, P.A.'s, and nurses,
wouldn't you make sure that the big third-party payors approved them?!
Especially when those insurance companies comprise the bulk of your practice?
Why would you bother to hire a doctor that only rich uninsured people
could afford?
And since there is no such animal as a rich but uninsured person,
who in the hell do you expect such a doctor to treat? And then bill afterward?
It makes no sense to me.

Anyway, I'm off work until Monday afternoon, resting my right arm.
Mostly I've been tottering around the house, clutching the offending member
to my side and self-medicating.

And wincing. I'm a good wincer.
I don't always say much about how much pain I'm in.

It takes more talent to seem as if you're trying to 'carry on', stiff upper lip and all.

So, you reach for your coffee mug (or Vicodin bottle or whatever) and freeze mid-motion,
with perhaps a small yip like puppies do when they're spanked on the butt with
a newspaper for again mistaking the carpet for the newspaper at the door- and scrunch
your face, remembering to include the all-important eye-squinting.
Done correctly, this will melt the hardest heart and result in someone handing
you your coffee (or drugs or whatever). Trust me on this--I've been
perfecting this technique for a long time.

The Wince.

Just one more of my many talents.

Friday, July 24, 2009

Semi-Out of Commission


I'm sorry to be such a non-entity around the blogosphere lately.
My summer has gotten frantic, and to top it all off,
I've injured my right arm.
Forearm, to be exact.

Hold out your forearm, palm facing down.
Now, try to twist it, pinkie first, up, thumb down.
Does it hurt?
Of course not. If you run out of range, your
forearm just stops moving.
But mine is very tender, nay, inflamed and
it sends burning pain shooting down from the base
of my little finger to my elbow.
When I try to turn it palm side up, it won't go far without
hurting either.

Harumph! (As an old friend of mine would say).
If I'm very careful to keep my wrist in neutral, it doesn't hurt
and I can type. Otherwise, I'm sunk.

Motrin 800's are my new best friends.

We have a family cookout in Ohio scheduled for tomorrow, which means
a three-hour drive there, and a three-hour drive back.
In two cars because there are so many of us. I may not be driving much.
And of course the canoe trip on Sunday is out for this not-very-outdoorsy-anyway one.

But it also means I probably won't be able to do anything useful around the house
that afternoon either. Maybe that'd be a good time to get something baked,
which hasn't happened around here in donkeys' years.
But I'm right-handed. Sigh.
I'll keep you posted.

Double harumph!

Saturday, July 18, 2009

A Cautionary Tale by Jane


The Western Shore, a Cautionary Tale
by Jane


Once upon a time, there was a man who discovered a beautiful beach.


He decided to walk along the shore and enjoy nature's beauty.
He removed his shoes, the better to traverse the sandy water's edge.


And at first, all went well. The soft sand felt warm on his toes.

Which way shall I go? he wondered. Finally he struck a northerly path.

He noticed many others happily playing on the shore.

The waves lap...lap...lapped on the sand.

It was lovely and peaceful.


The man walked far. The sun lowered on the horizon.

He decided it was time to retrace his steps.
He paused to take one last look over the vast expanse of water,
and then...

and then...

he heard a faint sucking noise.

He tried to turn and flee from the noise, but it held him in
its grip, paralyzing his efforts...

Frantic, he looked down...

down...

down...

down to his feet.

But they were gone!!


No matter how he struggled, how valiantly he fought, he could not get free
of the warm and sucking sand.

Soon his right foot disappeared from sight.

And the man was left with just his left foot. (And a stump.)

Being a positive person he reckoned, This is not too bad. I can always hop.


But even as these thoughts were being thought, The Cannibal Sands
claimed his right foot as well.


And that's the story of the man they call Stumpy.


And the tide goes relentlessly on, seeking new victims.

Please share this story as a warning to others.

You never know who might be next.